Notice: Undefined variable: html in /var/www/vhosts/epoxyflooringfortworth.com/public_html/wp-content/themes/Avada-Child-Theme/functions.php on line 60
Modernize a Garage Floor with

Epoxy Floor Covering

Are you finally over your boring, grey, hard concrete garage floors? While they are practical and hold up well, for the most part, they are also pretty plain and come with cracking and deterioration. Now might be a great time to reconsider what you can do with your garage floors, especially if you spend a good bit of time in your garage for hobbies and house projects.

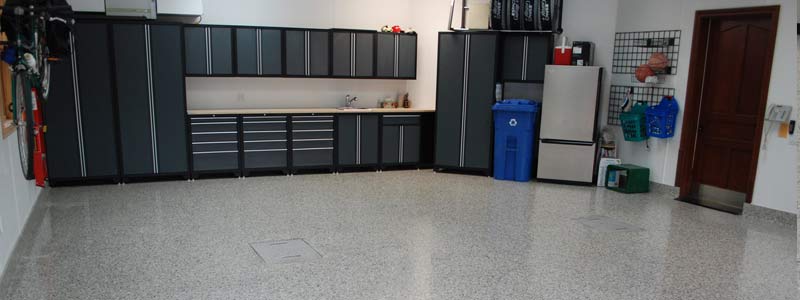
One of the most popular ways to reimagine your garage floors is with epoxy floor coverings. This type of flooring is ideal for busy or heavily trafficked garages, and have a beautiful final aesthetic value. Here is a step by step look at how epoxy can completely transform and modernize your garage floors.

Step One: DIY or Hire it Out
One of the best things about epoxy covering for your garage is that you can either choose to do it yourself or hire a professional. Either option is great but if you’re new to these types of projects we might suggest consulting with the pros. Furthermore, when you use professional epoxy floor installers, you will have more options in color, patterns, emblems, and more. If you choose to do it yourself there are several kits you can get both in-store or online.
Step Two: Test Your Concrete
You will need to determine if your concrete is sealed. You can do this by cleaning a section of it with water and seeing if the water absorbs into the concrete or beads on the surface. If you have a sealant on your concrete, you won’t want to epoxy over it. You will want to contact a pro and have a discussion about how to prep your sealed concrete floor so you can epoxy over it.
Step Three: Thorough Cleaning
If your cement garage floors aren’t sealed, it’s time to get them prepped for epoxy. You will need to broom out any debris and clean it with a hose. Make sure to spend extra time on areas with oil or chemical spills. You can use a degreasing product if you have trouble getting those spills up. Hose down your garage to ensure all the dust is removed and let them dry out completely.
Step Four: Chemical Etching
Just as you would do with wood by sanding, you’ll do something similar with chemicals resulting in a process called etching. You may have seen this with glass as well. You need to give the epoxy something to “stick to.” The etching process leaves a crystalized component behind and allows the epoxy material to latch and adhere to the surface. Follow the instructions from your kit, which will explain how to mix your etching material and how to apply it. Most often, the instructions will advise using a plastic container to do this in, since the acids in the etching material will likely interact with metal.
Step Five: Prep For Epoxy
Your epoxy prep is really the same step as clean up after etching. You’ll need to rinse the space well and squeegee the water out of the garage. It’s important to remove any post etching product so you have the right surface for the epoxy. You can use shop vacs to help you get any lingering debris or material out of the space.
Step Six: Apply Epoxy

After your floor is clean and dry from etching, prepare your epoxy resin according to the manufactures strict instruction. As you await the resin mix to activate, make sure the edges of your garage are clear or, use painters tape to keep the resin from the walls. Plot your application pattern as you’ll be working section by section to ensure you get a consistent look throughout your garage floor.

 You will epoxy the edges of the garage first and then paint the rest of the garage floor in from there. Choose a roughly 3×3 section to work before moving on to the next section. Often, the best application is done with a paint roller. You’ll want to add your speck or extra color applications before you move to the next section.

Step Seven: Let Cure

Most epoxy floor DIY kits suggest waiting 24 to 48 hours before walking or placing items back in the garage. You are giving the product a chance to dry and cure which takes longer than traditional paint. Follow your recommendation from the manufacturer. Also, if you made a mistake or got epoxy on tools, most DIY products are water-soluble. You should be able to clean those up with little effort but do so before the epoxy cures.

This gives you the step by step process of the epoxy floor covering process. With any luck, you better know whether or not you want to tackle this alone or hire the project out. This kind of project requires some patience and prep work but has great results that are worth the effort. Even more, epoxy floors give any house a more polished aesthetic and add value to your home.